Method of Changing the SID of a Windows Server 2016 VM

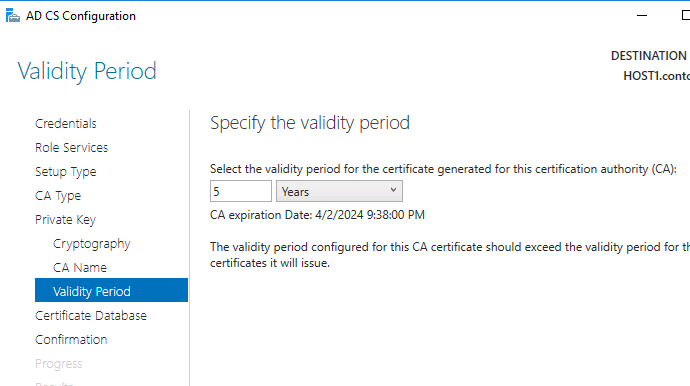
In a virtual environment, there are scenarios where you would want to clone an existing Windows server virtual machine to provide redundancy for whatever application.

Having the ability to create duplicate virtual machines by cloning it is a great feature but it creates a problem in a Windows Active Directory environment. There is a unique identifier called Security ID also known as SID which is created during installation to identify each machine in a Windows environment.

Active Directory has a big problem when it discovers two machines with the same SID because it identify them as the same object. If the computer with the same SID attempts to join the same domain, it will generate an error and terminate the process. No worries, there is a solution for the Windows computer.

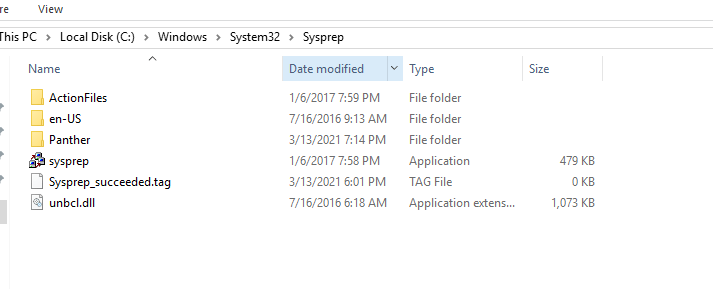
Microsoft has included a tool called Sysprep which is natively installed on Windows server which is located in the folder path:

%systemroot%\System32\Sysprep

To start the process, you will navigate to the folder and follow the steps below:

  • Right click and Run the System Preparation Tool (Sysprep.exe) as an administrator
  • Select the option Enter System Out-of-Box Experience (OOBE) for System Cleanup Action with the option Generalize ticked.
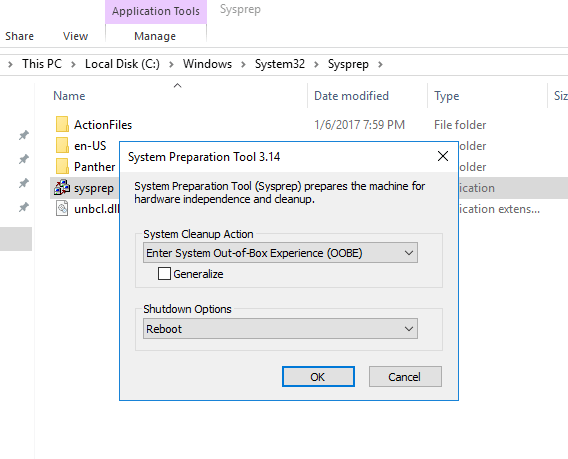
  • Select the Shutdown option: Reboot
  • Then select OK.

Once the virtual machine reboots, it will prompt to select the usually Microsoft settings during initialization, accept the EULA and to set the Administrator password.

Note that this method does not remove any installed applications except device drivers. It also removes the usually windows configuration such as IP address and machine name.

The SysPrep will work in other versions of Windows.

reference: https://docs.microsoft.com/en-us/windows-hardware/manufacture/desktop/sysprep–generalize–a-windows-installation

Microsoft: Enabling Recycle Bin feature in Windows Server 2016 Active Directory Domain Services

There is a new feature available in Active Directory Administrative Center (ADAC) in the Windows Server 2016 that allows you restore deleted AD objects from the Recycle Bin (although it could be activated from Windows server 2008 R2 using Powershell). It allows you to enable it at the Domain or Forest level. The only caveat is once it is enabled, it cannot be disabled. The default lifetime for a deleted object to remain in the AD Recycle Bin is 180 days.

To enable the feature using Powershell:

Enable-ADOptionalFeatureIdentity ‘Recycle Bin Feature’Scope ForestOrConfigurationSetTarget ‘domain.com’Server DC1

To enable the feature in Active Directory Administrative Center:

Go to Server Manager –> Tools –> Active Directory Administrative Center

servermgr_Adac

Highlight the domain or forest on the left pane and then under the Task pane on the right under the domain, select Enable Recycle Bin.

Enable_recycleBin_ADAC

You will get the warning that once it is enabled it cannot be disabled, select Ok.

rc_warn

Microsoft Powershell – Install and Configure AD Certificate Services (Windows Server 2016)

This article will demonstrate how to install and configure the Active Directory Certificate Services (AD CS) and the Certification Authority (CA) using both the Server Manager and corresponding Powershell cmdlet.

Using Powershell method

Check if the Active Directory Certificate Service is installed

Get-WindowsFeature AD-Certificate


To install the Certification Authority features, run the following cmdlet:

Install-WindowsFeature ADCS-Cert-Authority -IncludeManagementTools


Configuring the Active Directory Certificate Services with a Standalone Root CA on Host1.

Install-ADcsCertificationAuthority –Credential (Get-Credential) -CAType [StandaloneRootCA]CACommonName“domain-Host1-CA-1”CADistinguishedNameSuffix “DC=domain,DC=com” CryptoProviderName“RSA#Microsoft Software Key Storage Provider” -KeyLength 2048 HashAlgorithmName SHA1 ValidityPeriod Years ValidityPeriodUnits3DatabaseDirectory “C:\windows\system32\certLog”LogDirectory “c:\windows\system32\CertLog”Force

You can select the CA Type by setting the parameter for –CA Type to either StandaloneRootCA, StandaloneSubordinateCA, EnterpriseRootCA or EnterpriseSubordinateCA. For the CA options like the Cryptographic Provider, Hash Algorithm and Key length will have to be known so that it is selected correctly.

Example for the key length, the values can be 512, 1024, 2048, 4096 which has to be typed out.

For Hash Algorithm, the options are: SHA256, SHA384, SHA512, SHA1, MD5, MD4, MD2.

For the Cryptographic Provider, the parameter -CryptoProviderName can be:

  • RSA#Microsoft Software Key Storage Provider
  • ECDSA_P521#Microsoft Software Key Storage Provider
  • ECDSA_P256#Microsoft Software Key Storage Provider
  • ECDSA_P384#Microsoft Software Key Storage Provider
  • DSA#Microsoft Software Key Storage Provider

and any other…


Removing the AD CS and CA feature from the server.

Remove-WindowsFeature ADCS-Cert-Authority


Using the Server Manager


Go to Server Manager–> Manage –> Add Role and Features

servermgr

Select Role-based or feature-based installation

role-based

Select the Server to install it on

server

Tick the Active Directory Certificate Services

adcs_server_role

Tick the Certification Authority

CA_role

The feature will be installed and then you can select Configure Active Directory Certificate Services to setup the CA.

configure_ADCS_CA

Enter the Credential that have permission to configure the CA. Note the following:

For Standalone CA: you need local administrator rights

For Enterprise CA: you need Enterprise Admin rights

ca_credential

Select  role services: Certification Authority (CA)

configure_CA

select Standalone CA. Once you know how to configure Standalone CA then you can easily configure Enterprise CA.

select_StandaloneCA

Select Root CA (this is the first CA)

select_RootCA

Select Create a new private key.

create_key

Select your preferred cryptographic provider, key length and hash algorithm

crypto_options

The Common Name and distinguished name suffix will be generated but you can enter your own name.

CA_CommonName

Select the validity period for the Certificate generated.

CA_Period

You can change certificate database and log path or let it remain at the default path

CA_DB-log

Confirm configuration settings of CA.

CA_result_page

Once the CA installation is complete, you can go to Server Manager –> Tools –> Certification Authority to view CA server in the MMC.